
In this article
To plan a storyboard with Kling Image 4.0 Image Sets, write the event in one sentence and assign each image a different stage of that event. Repeat the character and setting details that matter, then review the images together in story order. Approve the progression before turning the frames into video references.
What the new Image Sets workflow offers
Kling’s November 18 user guide describes Series Mode for generating related images in one request. The release notes say a series can contain up to ten images from one prompt. For a first story pass, choose a small set with a clear beginning and end. Three frames make it practical to inspect every transition. The example here is a storyboard brief you can adapt to your own scene.
Give each frame one event
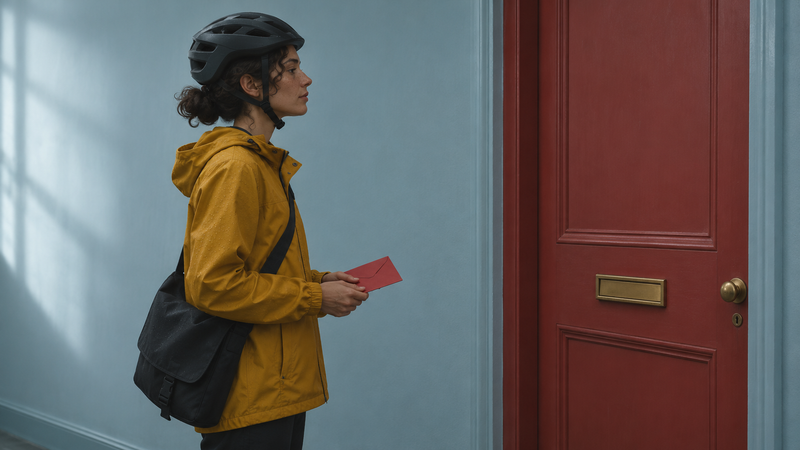
Imagine a courier in a yellow rain jacket carrying a black shoulder bag through a blue hallway. The courier delivers a red envelope through a closed red door’s letter slot. Write three beats. The first is a wide view as the courier stops at the door. The second is an insert of the envelope going through the slot. The third is a medium view as the courier turns away, with the delivery complete. Name those beats in the prompt so the model has a narrative structure to work from.
Separate shared details from shot instructions
Put the shared description first: the same courier, yellow jacket, black bag, red envelope, blue hallway, closed red door and soft side light. Then describe each frame’s action and shot size. Keep the bag on the same shoulder and the letter slot at a consistent height. If your workflow accepts an approved reference, include the one that establishes the character or location. Keep the actual source order and prompt with the output so a revision can start from the same brief.
Read the sequence at thumbnail size
Put the returned images in the intended order. At small size, can you recognize arrival, delivery and departure? A repeated image of the courier holding the envelope can leave the middle beat unresolved. Mark the affected frame and clarify the action in your next pass. At full size, inspect the jacket, bag, door hardware and envelope. A new handle or a bag that switches shoulders can weaken the connection even when each picture looks convincing on its own.
Review the camera before moving to video
Check that the insert shows the same action established by the wide frame and that the last frame follows it naturally. Save the accepted set as a contact sheet with brief notes about what changes between frames. Those notes help when deciding the movement and duration of later video shots. See Kling’s user guide and the release notes for Kling’s documented workflow. For scenes involving exchanged looks, read Tong’s guide to eyeline matching. Explore Tong Academy for more production planning.
Sources & further reading
Created with AI assistance. Sources are linked above.