
In this article
To brief a color change with MAI Image 2.7, name the surface that should change and describe the details that need to stay consistent. Review the edited material and the nearby edges separately, then compare the whole composition with the approved source. For a set of color options, begin each option from that same source.
What Microsoft announced on November 17
Microsoft announced MAI Image 2.7 and MAI Image 2.7 Flash for image generation and editing, with both in public preview through Microsoft Foundry. It highlights changes to an object’s color, material or position and consistency across edits. Its model card also describes targeted attribute changes. These are capabilities to evaluate against your brief. The chair example below gives you a way to decide whether a particular result is ready for use.
Write the material boundary into the brief
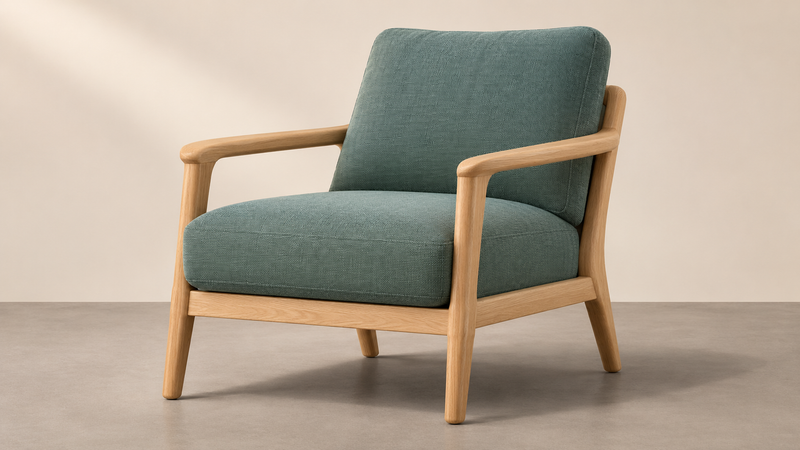
Imagine an oak armchair with teal fabric on its seat and back cushions. You need a rust-colored option for a campaign concept. Write, “Change the woven fabric on the seat and back cushions to muted rust. Keep the oak frame, cushion seams, chair position, camera angle and lighting consistent with the source.” The words seat and back cushions help define the area. Naming the seams protects a small structural detail that can otherwise get lost when the model redraws the material.
Start each color from the approved source
Save the source and make a separate request for each color option. This gives every version the same starting frame. If you want to refine a chosen rust version afterward, save that result and state what the next pass changes. Keep the input file and actual prompt beside each accepted result. In a contact sheet, show the versions at the same size so a larger crop does not make one color seem more compelling. Use approved fabric references when the color needs a closer visual target.
Inspect three areas before choosing a version
First look at the fabric itself. Check whether the weave, folds and seams still read as the same upholstery. Then follow the boundary where fabric meets wood, especially under the arms and around the seat corners. Watch for a rust tint leaking into the frame or a shifted cushion edge. Finally compare the floor shadow and background with the source. If only one small edge is wrong, correct that area where your editing tool allows. If the chair shape has changed, return to the source and simplify the request.
Approve the crop and color together
Place each candidate in the actual campaign layout. A warm background or a different surrounding color can change how the fabric appears. Check a close view for edge problems and the delivery size for the overall effect. A generated recolor is a concept to compare with the real fabric before using it as an exact product representation. See and for the model announcement and documentation, for assigning reference roles, and for more image workflows.